
Thanks to my Cameo I can easily change decal on my drawer shelf side.
(click on the keyword “Vinyl” to find all of them)
For this new model, I share with you my method for making multicolored ones.
Feel free to ask me via the comments the SST file.

Create one SST file by color.
All have the two bottom ellipses, they are benchmarks for the transfer paper.
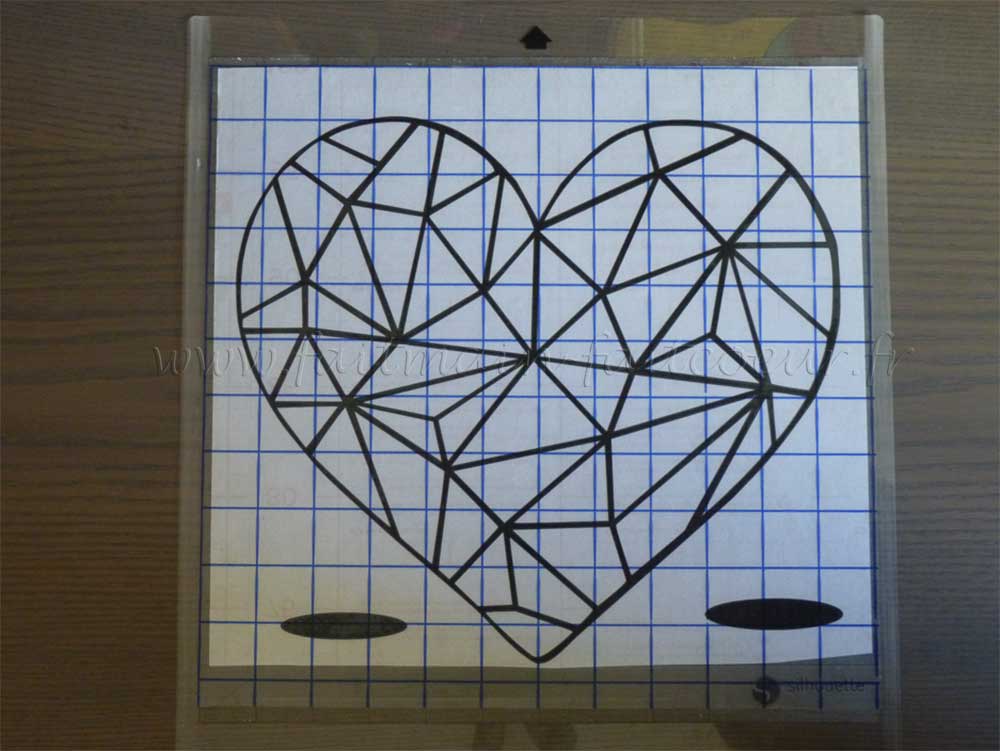
Cut out the “ black outlines ” layer and stick it on the transfer paper.
(note, my transfer paper is blue squared).
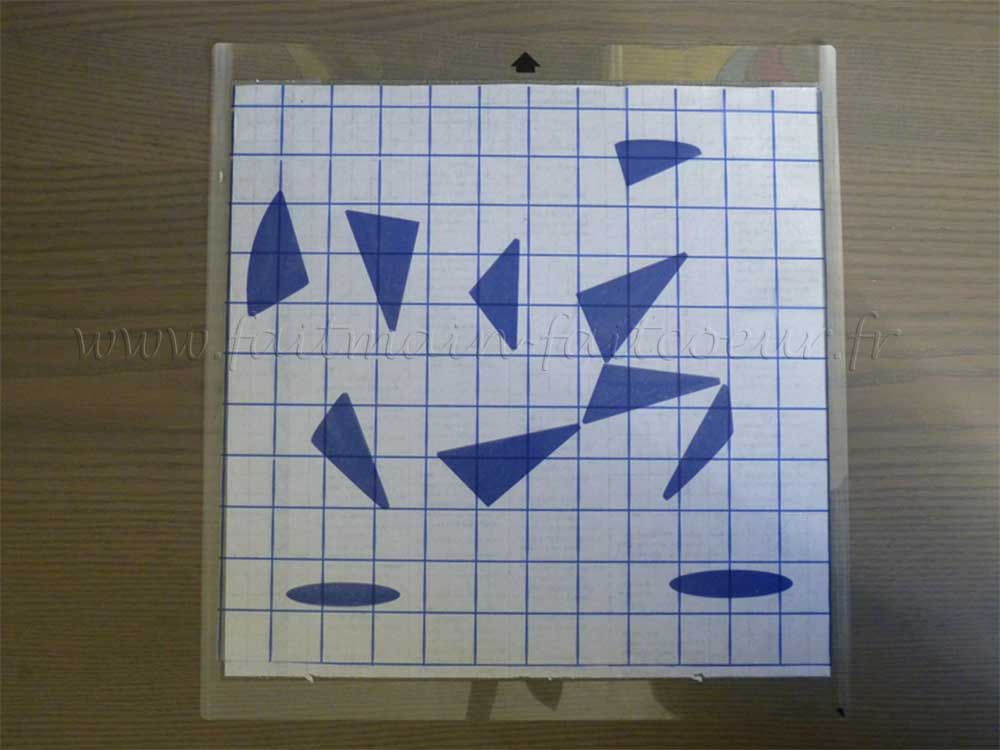
Cut out the first color layer.
(the photo of my “ anise ” layer was not usable, the illustration is with my “blue” one).
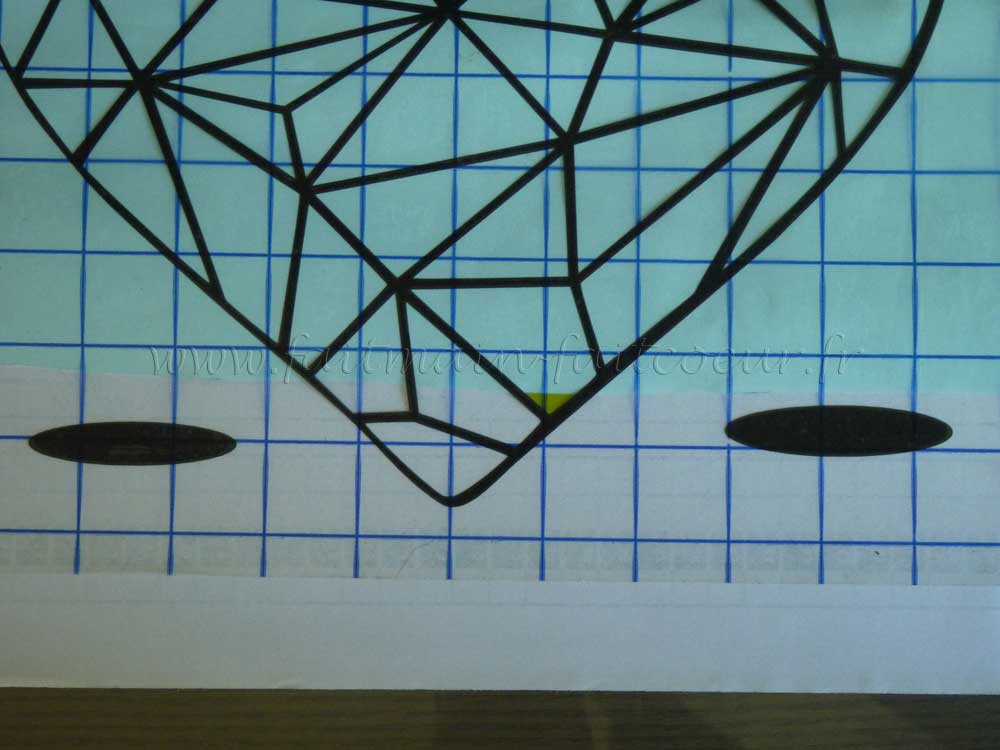
Take back the transfer paper with the black outlines.
By overlaying the ellipses, the anise zones will be perfectly in their place.

Smooth with a large ruler to avoid bubble or lag.

Smooth again with a decal squeegee to stick the tiles onto the transfer paper.
Repeat the steps with each color layer.
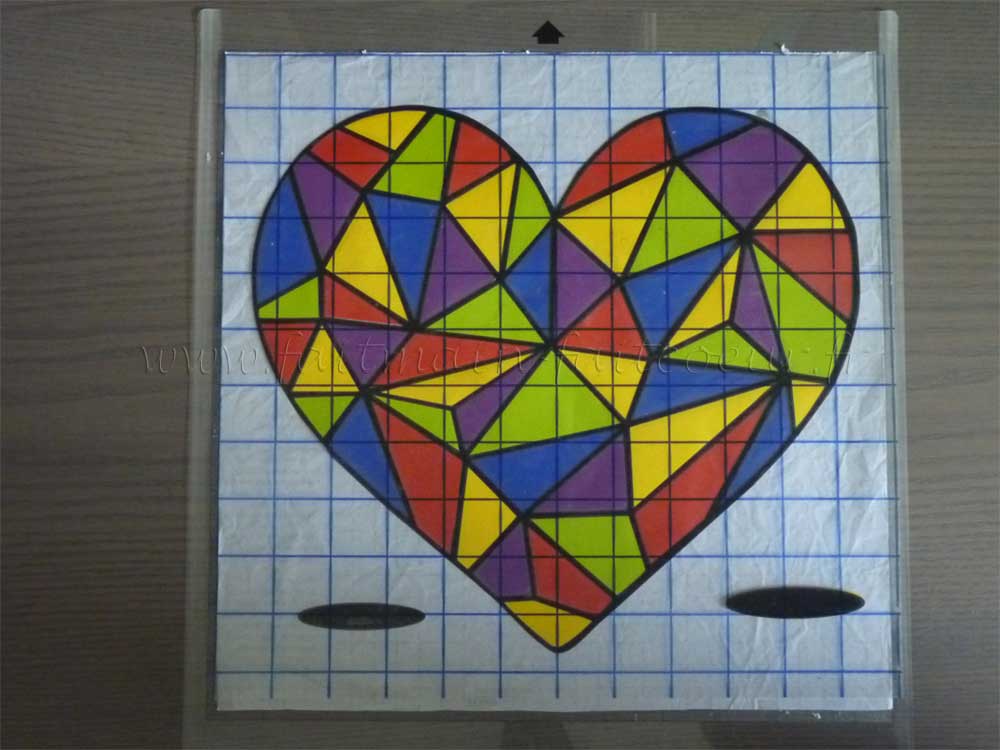
The pattern is completed, all the colors are present!
The ellipses are thick because all the colors are superimposed but we only see the blacks ones.
Stick your design on its support, after having of course removed the ellipses-benchmarks.
This pattern is a bit tricky because the colors are side by side.
To have some practice, I recommend you M CHAT where the colors are superimposed.
If you opt for superimposed colors, pay attention to the colors order: the first one cut will be the one above on the finished pattern.