
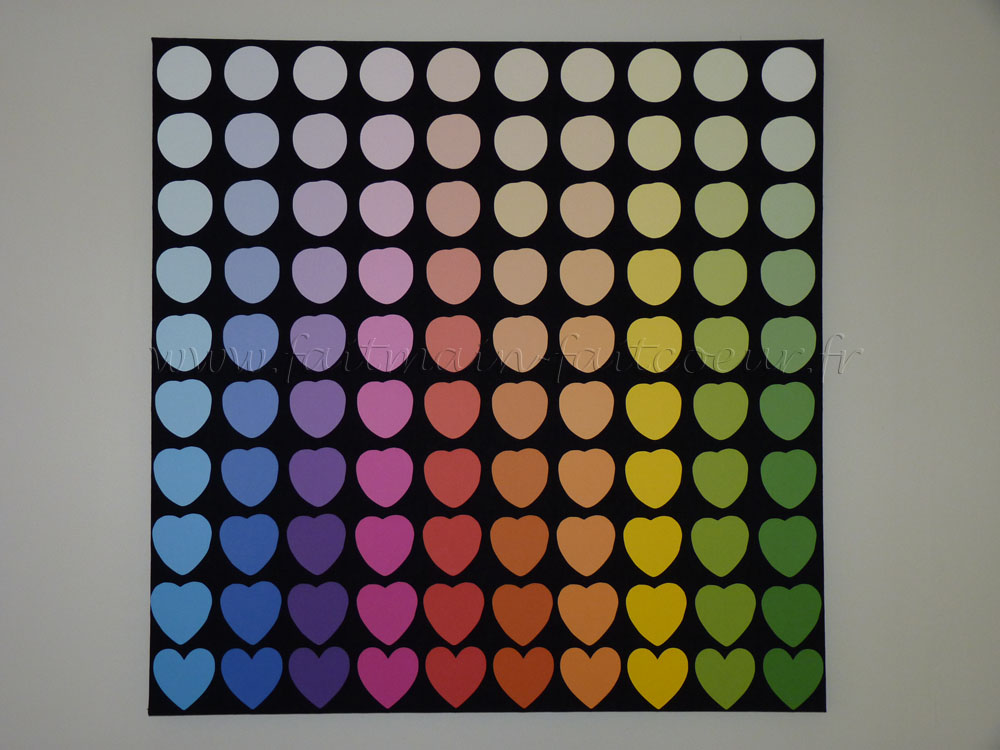
I had this 1m x 1m canvas since a while without knowing how to decorate it.
I wanted colors and geometric.
So I combined morphing and gradient .

A black background to brighten the colors.
Remember to staple on the back of the canvas if you don’t want to see the staples on the sides… ![]()

Printing on Canson paper for its good resistance to glue.
I used Illustrator for the morphing and Photoshop to choose the gradient of each color.
And of course my Cameo for cutting (print & cut function, it’s great!)
All my forms are ready, there are 100 …
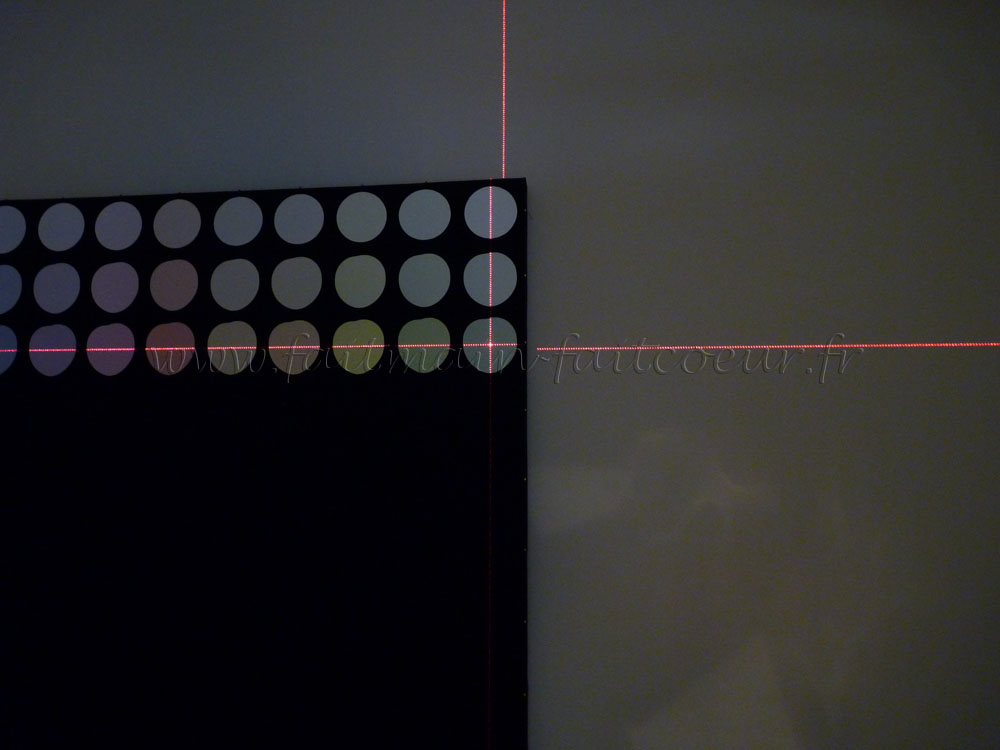
The trouble with geometric forms is that it’s ugly when it’s not straight.
So I took the laser level, which has the good idea to have a horizontal line and a vertical line.


If you don’t have this tool, put a pin every 10 cm around the frame.
Use a thread to connect them 2 by 2 and you get a regular grid.

I’m really happy with the result that brings color to my room and matches very well with my cushions.
(the tutorial is HERE)
If you own the Cameo, my files are available on email request.

Backstage : some hazardous constructions to have my laser level at the correct height (it’s the little box at the top of the pile…)
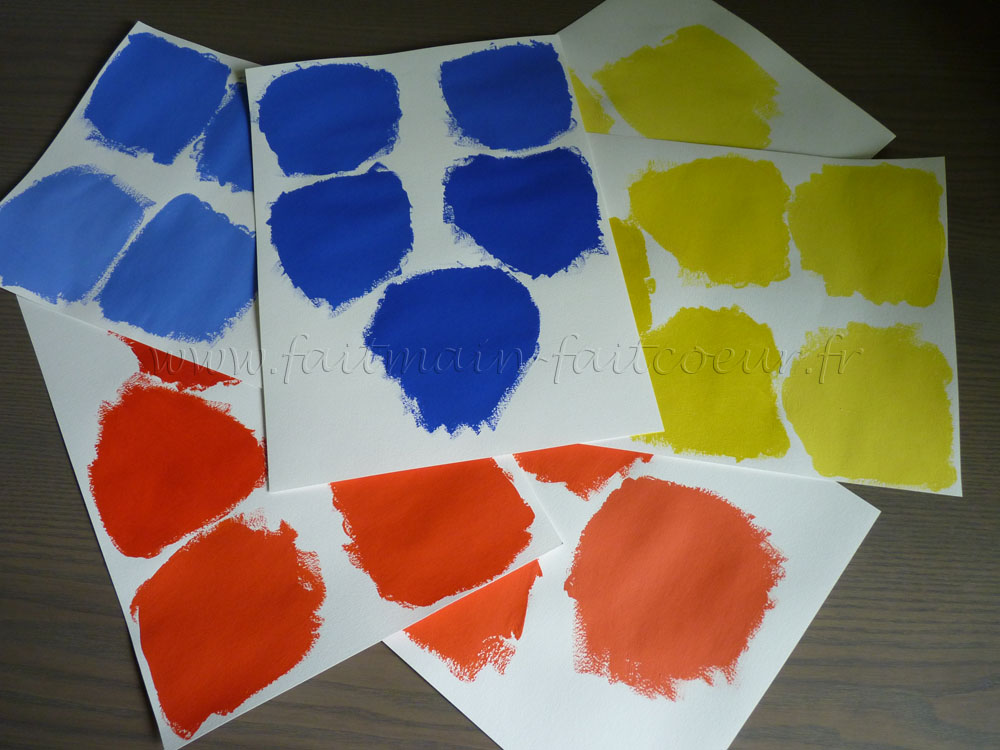
My failures : I wanted to make the gradient with paint, but except the primary colors, impossible to get nice secondary colors (due to non really miscible paints ![]() ).
).


Very nice!
That’s a brilliant idea to use pins and thread to make the layout grid. I’d have never thought of that. Thank you!